
NGINX OpenTelemetry 插桩 - 追踪请求
本指南介绍如何用 OpenTelemetry 在 NGINX 中追踪请求,并把 span 发送到 SigNoz。你只需加载 NGINX 原生的 OpenTelemetry 模块(ngx_otel_module),将其指向 SigNoz,NGINX 就会为它处理的每个请求创建一个 server span。
大部分步骤完全相同。只需把 exporter 端点设为 http://<signoz-host>:4317,并删除 header signoz-ingestion-key 这一行。详情参见 Cloud → Self-Hosted。
前提条件
- x86-64 或 ARM64 架构的 Linux
- 来自 nginx.org 软件包的 NGINX,或官方
nginxDocker 镜像。模块软件包与这些构建版本匹配,Ubuntu 和 Debian 官方仓库不提供该模块。 - 一个 SigNoz 实例(Cloud 或 Self-Hosted 均可)
将 trace 发送到 SigNoz
VM / Docker / Kubernetes / 哪些算 VM?VM 是运行在物理硬件上的虚拟计算机,包括:
- 云 VM:AWS EC2、Google Compute Engine、Azure VM、DigitalOcean Droplet
- 本地 VM:VMware、VirtualBox、Hyper-V、KVM
- 裸金属服务器:运行 Linux 的物理服务器
如果你在服务器或 VM 上以非容器方式运行 NGINX,请参考本节。
第 1 步:安装 OpenTelemetry 模块
按照官方 NGINX 指南为你的发行版配置 nginx.org 软件包仓库,然后安装 NGINX 和模块:
Debian / Ubuntu / RHEL 及其衍生版 / 复制sudo apt update
sudo apt install nginx nginx-module-otelsudo yum install nginx nginx-module-otel该软件包会把 ngx_otel_module.so 安装到 /etc/nginx/modules/ 目录。
第 2 步:加载模块
在 /etc/nginx/nginx.conf 文件顶部、所有 block 之外添加这一行:
load_module modules/ngx_otel_module.so;第 3 步:配置 exporter
创建/etc/nginx/conf.d/otel.conf。默认的 nginx.conf 会在其 http 块中包含 conf.d/*.conf,因此这些指令将应用于所有服务器:
/etc/nginx/conf.d/otel.conf
otel_exporter {
    endpoint https://ingest.<region>.signoz.cloud:443;
    header signoz-ingestion-key <your-ingestion-key>;
}

otel_service_name <service-name>;
otel_resource_attr service.version <service-version>;
otel_trace on;
otel_trace_context propagate;
请核对以下取值:
<region>:您的 SigNoz Cloud 区域<your-ingestion-key>:您的 SigNoz ingestion key<service-name>:此 NGINX 实例的描述性名称(例如edge-nginx)<service-version>(可选):您的发布版本或 git SHA(例如1.4.2)。如果不需要,请删除该行。
两条指令控制追踪:
otel_trace on会为每个请求创建一个 span。otel_trace_context propagate会延续传入的 W3Ctraceparent头,并将上下文传递给上游服务器。被仪表化的后端随后会加入同一 trace。
步骤 4. 重启 NGINX
检查配置,然后重启 NGINX:
Copysudo nginx -t
sudo systemctl restart nginxnginx -t 应输出 syntax is ok 和 test is successful。请使用 restart 而非 reload:新安装的 nginx.org 服务默认处于停止状态,reload 在停止的服务上会失败。
官方的 nginx 镜像提供带 -otel 标签的版本(例如 nginx:1.31-otel),这些镜像已包含该模块。镜像在启动时会在 /etc/nginx/templates/ 下的文件中填充环境变量,因此您可以在运行时传入 ingestion key。
步骤 1. 创建导出器模板
在您的 Dockerfile 旁边创建 otel.conf.template:
otel_exporter {
    endpoint https://ingest.<region>.signoz.cloud:443;
    header signoz-ingestion-key ${SIGNOZ_INGESTION_KEY};
}

otel_service_name <service-name>;
otel_trace on;
otel_trace_context propagate;
请核对以下值:
<region>:你的 SigNoz Cloud 区域<service-name>:此 NGINX 实例的描述性名称(例如edge-nginx)
请保留 ${SIGNOZ_INGESTION_KEY} 原样不变。容器启动脚本会将其替换为环境变量。
第 2 步。创建 Dockerfile
DockerfileFROM nginx:1.31-otel
# load_module 必须位于 nginx.conf 的第一行
RUN sed -i '1i load_module modules/ngx_otel_module.so;' /etc/nginx/nginx.conf
COPY otel.conf.template /etc/nginx/templates/otel.conf.template
COPY default.conf /etc/nginx/conf.d/default.conf请用你自己的服务器配置替换 default.conf。该镜像会将渲染后的模板写入 /etc/nginx/conf.d/otel.conf,默认 nginx.conf 会在其 http 块中包含此文件。
第 3 步。构建并运行容器
复制docker build -t nginx-otel .
docker run -d -p 8080:80 -e SIGNOZ_INGESTION_KEY="<your-ingestion-key>" nginx-otel请核对以下值:
<your-ingestion-key>:你的 SigNoz 摄入密钥
此设置运行官方的 nginx:1.31-otel 镜像,并从 ConfigMap 挂载其配置。Secret 用于存储摄入密钥。
第 1 步。创建用于摄入密钥的 Secret
复制kubectl create secret generic signoz-ingestion \
--from-literal=ingestion-key="<your-ingestion-key>"请核对以下值:
<your-ingestion-key>:你的 SigNoz 摄入密钥
第 2 步。创建 ConfigMap
ConfigMap 包含两个文件。nginx.conf 用于加载模块并存放你的 server 块。otel.conf.template 存放导出器设置,镜像会在启动时填入摄入密钥:
apiVersion: v1
kind: ConfigMap
metadata:
  name: nginx-otel
data:
  nginx.conf: |
    load_module modules/ngx_otel_module.so;

    worker_processes auto;
    events {}

    http {
        include /etc/nginx/conf.d/otel.conf;

        server {
            listen 80;
            location / {
                proxy_pass http://<upstream-service>:<port>;
            }
        }
    }
  otel.conf.template: |
    otel_exporter {
        endpoint https://ingest.<region>.signoz.cloud:443;
        header signoz-ingestion-key ${SIGNOZ_INGESTION_KEY};
    }
    otel_service_name <service-name>;
    otel_trace on;
otel_trace_context propagate;请核对以下配置值:
<region>:你使用的 SigNoz Cloud 区域<service-name>:这个 NGINX 实例的描述性名称(例如edge-nginx)<upstream-service>:<port>:NGINX 代理到的 Kubernetes Service。请将server块替换为你自己的配置。
这里只能 include conf.d/otel.conf,不能用 conf.d/*.conf。镜像自带一个 conf.d/default.conf,它同样监听 80 端口,会在你的 server 块之前抢先返回欢迎页面。
步骤 3. 在 Deployment 中挂载 ConfigMap
在 Deployment 的 NGINX 容器中添加环境变量和卷挂载:
nginx-deployment.yamlspec:
template:
spec:
containers:
- name: nginx
image: nginx:1.31-otel
env:
- name: SIGNOZ_INGESTION_KEY
valueFrom:
secretKeyRef:
name: signoz-ingestion
key: ingestion-key
volumeMounts:
- name: nginx-otel
mountPath: /etc/nginx/nginx.conf
subPath: nginx.conf
- name: nginx-otel
mountPath: /etc/nginx/templates/otel.conf.template
subPath: otel.conf.template
volumes:
- name: nginx-otel
configMap:
name: nginx-otel步骤 4. 应用变更
复制kubectl apply -f nginx-otel-configmap.yaml
kubectl apply -f nginx-deployment.yaml
kubectl rollout status deployment/<deployment-name>请核对以下配置值:
<deployment-name>:运行 NGINX 的 Deployment
验证
- 向 NGINX 发送若干请求,例如执行
curl http://localhost/。 - 打开 SigNoz,进入 Traces 页面。
- 根据
otel_service_name设置的service.name进行过滤。
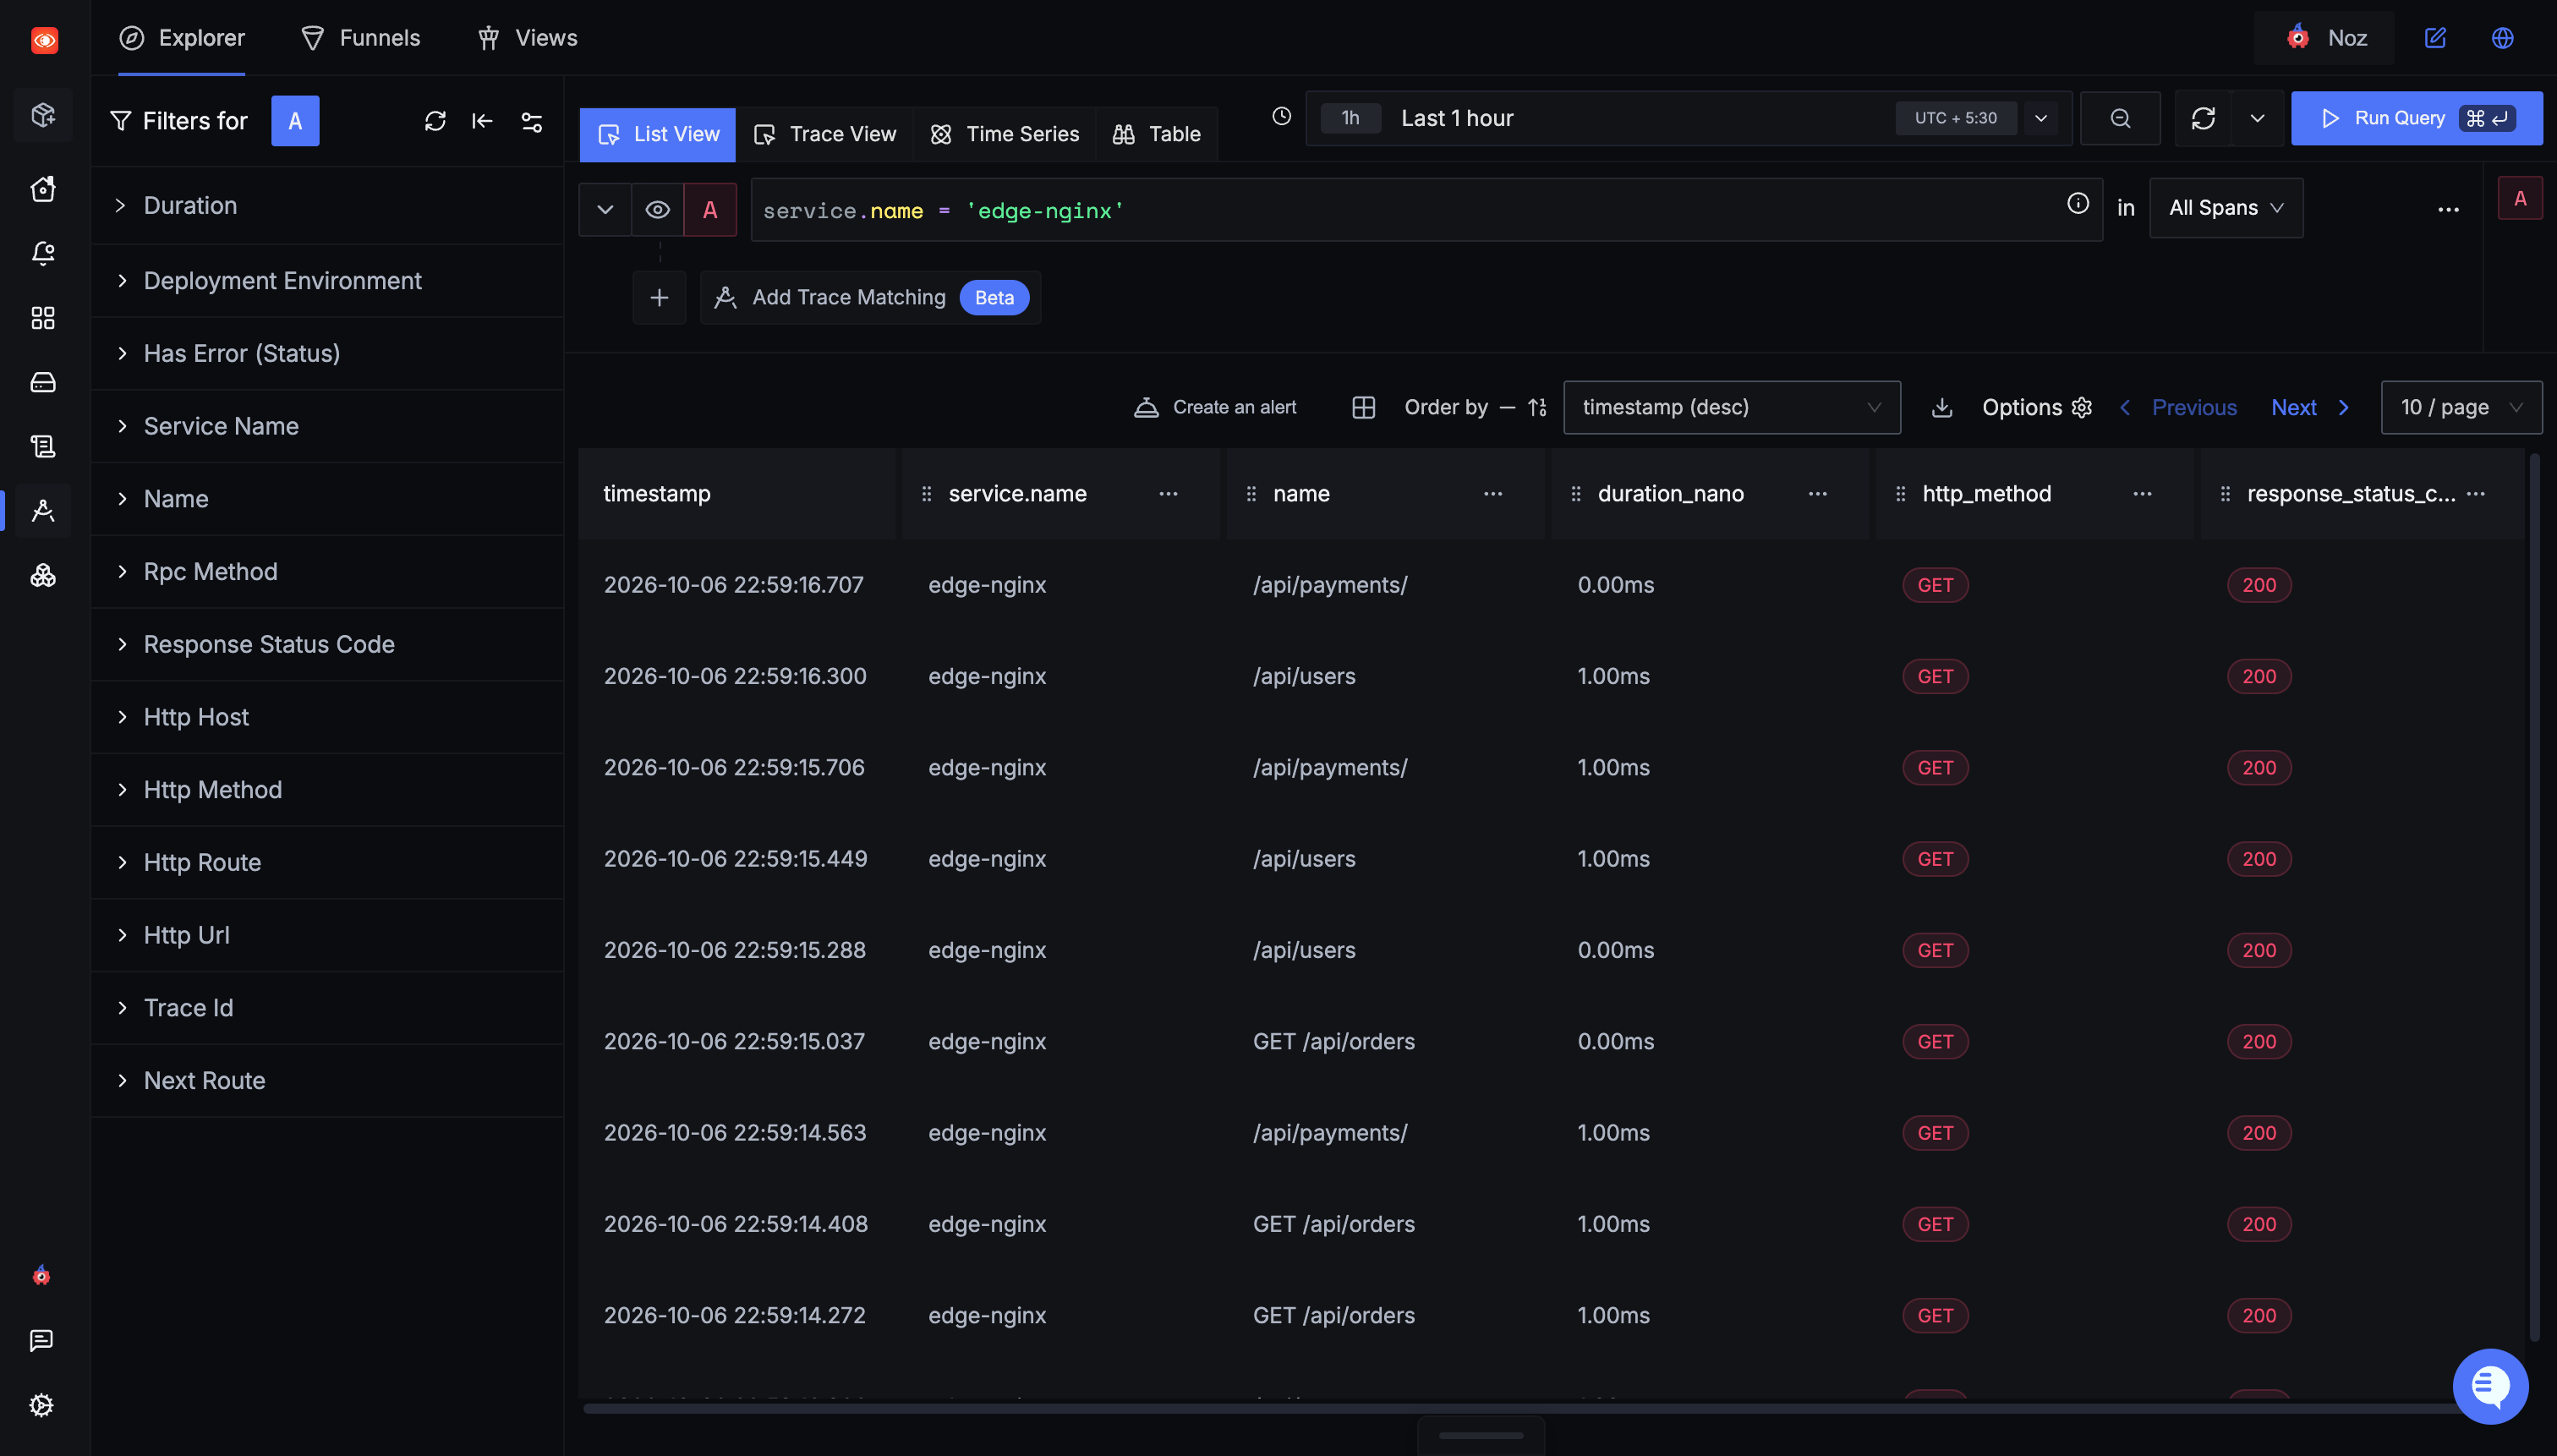
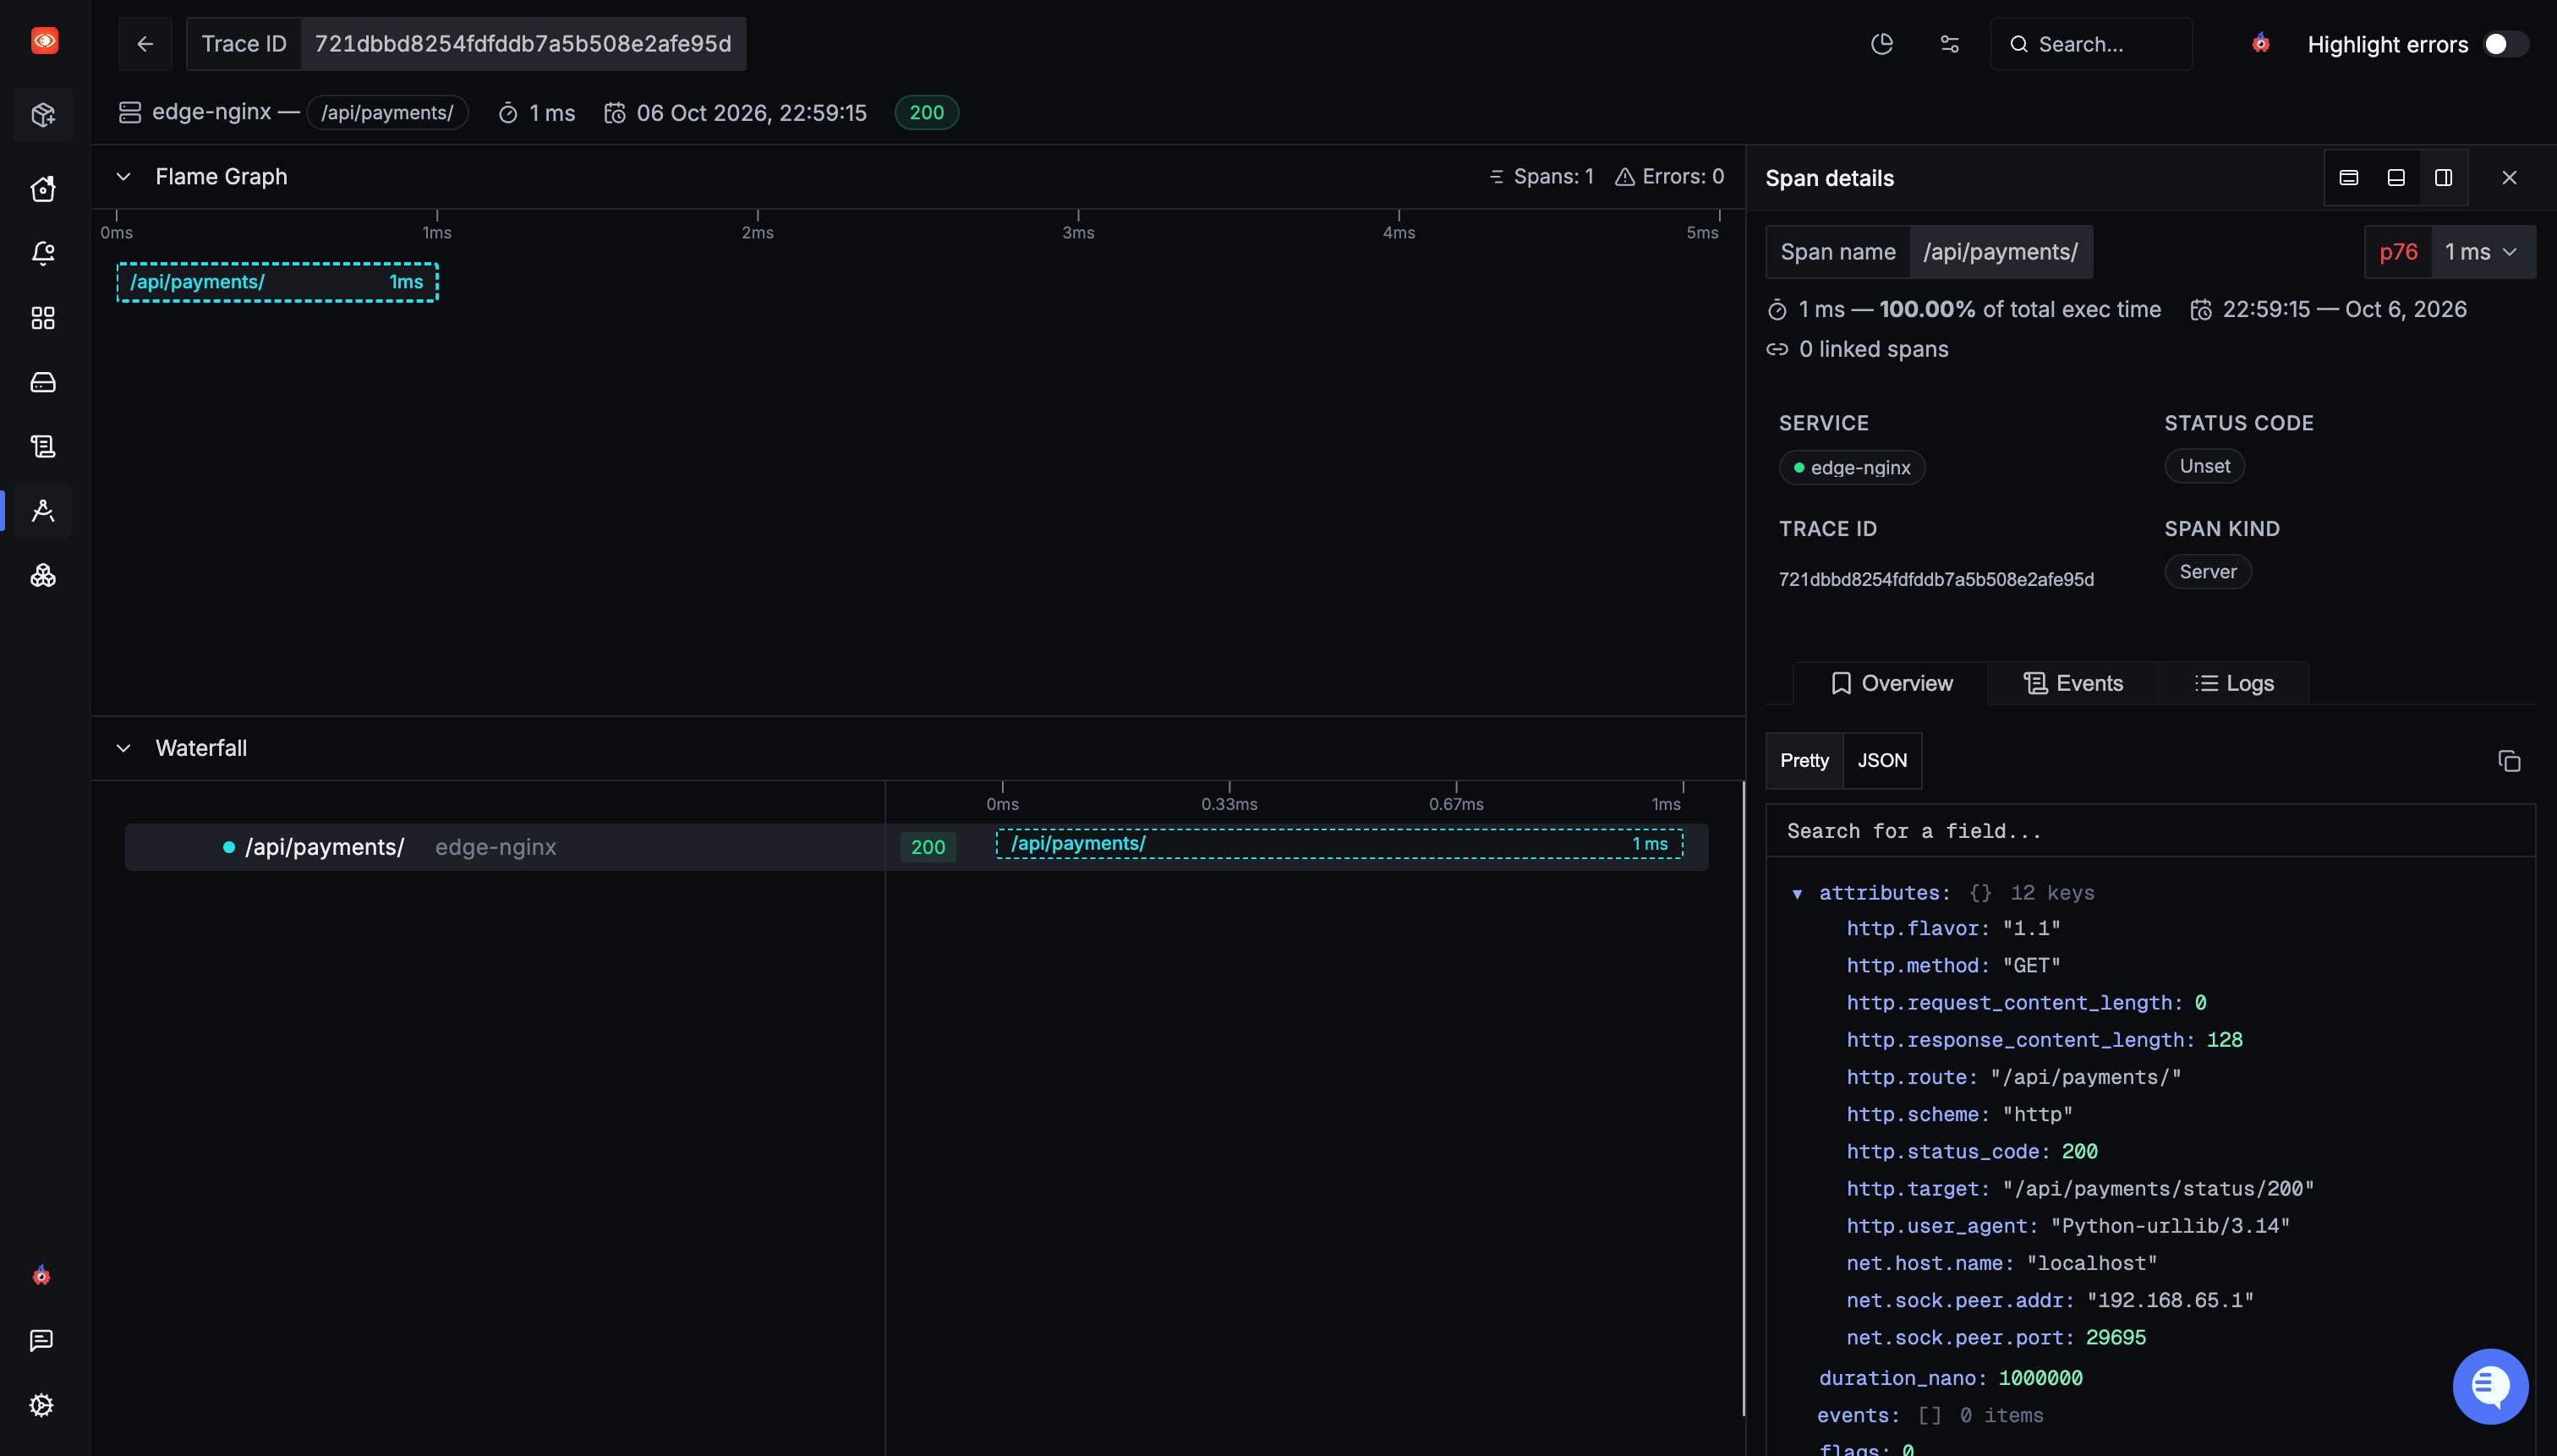
- 点击某个 span,查看其属性,例如
http.method、http.target和http.status_code。
NGINX 每 5 秒导出一次 span,请在刷新前等待几秒。
每个 span 以匹配请求的 location 块命名,例如 / 或 /api/orders。如需设置不同名称,请在 location 块内添加 otel_span_name:
location /api/orders {
    otel_span_name "GET /api/orders";
    proxy_pass http://orders:8080;
}
NGINX 将 5xx 响应的 span 标记为错误。对于 4xx 响应,span 保持未设置状态。
故障排除
NGINX 会将导出器错误写入错误日志。在虚拟机上,请检查 /var/log/nginx/error.log。在 Docker 和 Kubernetes 环境中,运行 docker logs <container> 或 kubectl logs deployment/<deployment-name>。
为什么 nginx -t 报告 unknown directive "otel_exporter"?
NGINX 未加载该模块。请在 nginx.conf 的第一行添加 load_module modules/ngx_otel_module.so;,位置需在所有块外部,